If you’re into lash trends, chances are you’ve seen the “wet set lash” look all over Instagram, TikTok, and beauty blogs. This dreamy lash style is fluttery, glossy, and gives your eyes that “fresh-out-of-the-shower” vibe — like your natural lashes, but 10x more dramatic and defined.
But here’s the catch: wet set lashes are usually done at salons with professional extensions, which can cost a lot of money and require hours of lying still with your eyes closed. If that doesn’t sound appealing, don’t worry — you can totally achieve the same stunning look at home. In this guide, we’ll walk you through everything you need to know about wet set lashes, including how to DIY them safely and beautifully.
What Are Wet Set Lashes?
“Wet set” lashes are a style of lash extensions that mimic the look of wet, clumped-together natural lashes — the kind you see after getting out of the shower or swimming. Instead of a soft, fluffy fan like traditional volume lashes, wet set lashes use closed fans or narrow lash clusters to create a more spiky, textured, and dewy look.

They’re loved for a reason:
-
👁️🗨️ They make your eyes look bright and awake
-
🌊 They give a natural yet dramatic effect
-
💫 They’re super trendy and work for both day and night makeup looks
Traditionally, lash artists achieve this by applying closed volume fans one by one. But if you don’t want to spend the time or money on salon visits, there are easier ways to get that same vibe at home.
Why Skip the Salon?
Let’s be real — salon lash extensions are beautiful, but they’re not for everyone. Here’s why many lash lovers are switching to DIY options:
-
💸 Cost: A wet set lash appointment can cost anywhere from $100 to $250 — and that’s just the initial set. Fills every few weeks cost extra.
-
⏱️ Time: The appointment can take 1.5 to 3 hours, plus frequent touch-ups.
-
🧼 Maintenance: You have to be careful with cleansing, sleeping positions, and lash serums.
-
🏡 Convenience: Doing your lashes at home means you can touch them up anytime and remove them whenever you want.
If this sounds like a better option for you, let’s talk about how to recreate that salon-quality wet set lash look — DIY style.
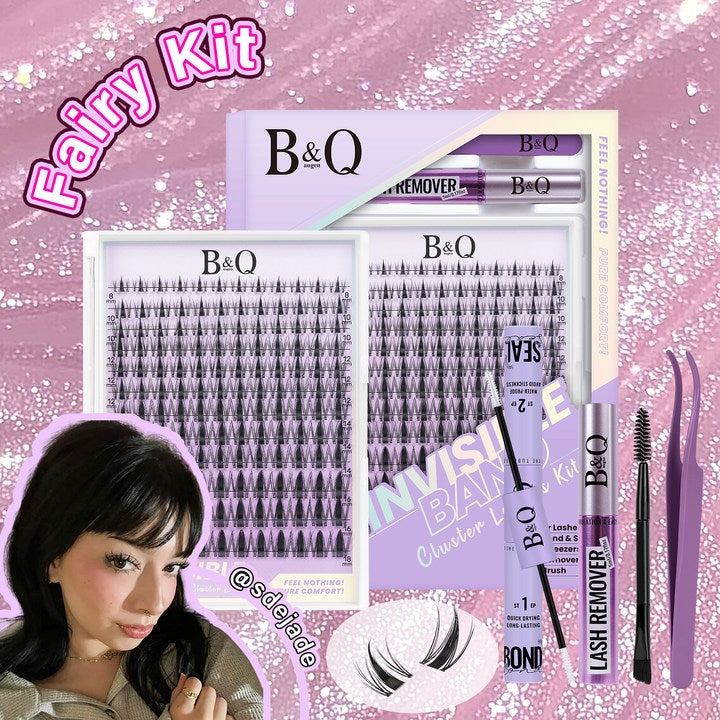
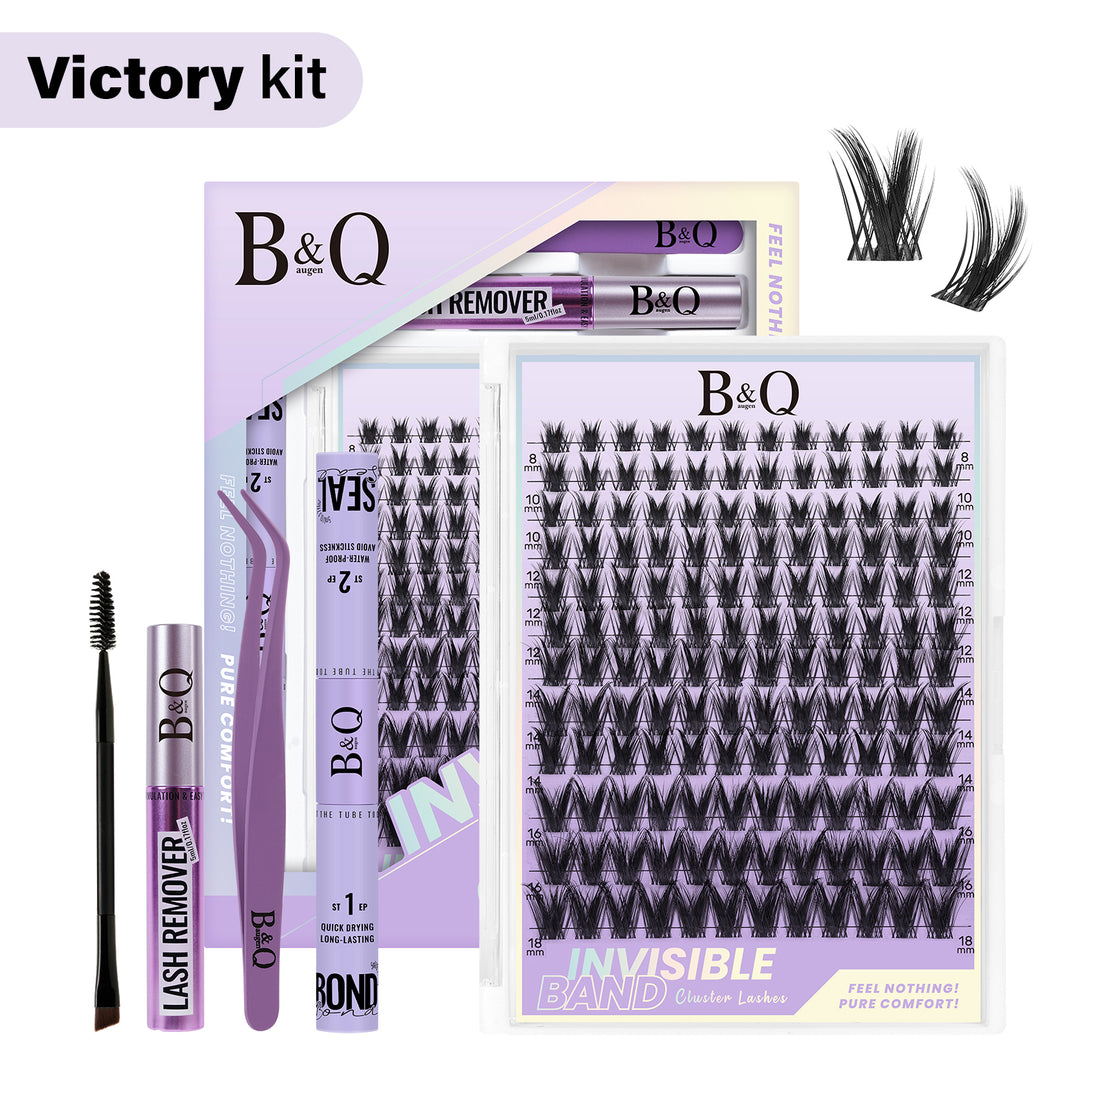
DIY Wet Set Lashes: What You’ll Need
Creating a wet set lash look at home doesn’t require fancy tools — just the right products and a little patience. Here’s your checklist:
-
🪶 DIY lash clusters: Choose narrow clusters or “closed fans” that mimic the spiky effect. Look for 30D or 40D clusters for a more dramatic result.
-
✨ Bond and seal: These are like lash glue but gentler and more flexible. Bond sticks the lashes to your natural ones, and seal locks them in place.
-
🔍 Tweezers or lash applicator: To place clusters precisely and comfortably.
-
🪞 Mirror and good lighting: Trust us, this makes all the difference.
Step-by-Step: How to Achieve Wet Set Lashes at Home
Follow these easy steps to get that glossy, textured wet lash effect without ever stepping into a salon:
1. Prep Your Natural Lashes
2. Choose the Right Clusters
3. Apply the Bond
4. Place Lash Clusters Underneath
💡 Pro tip: Stagger different lengths to mimic the random, wet-lash texture. For example, alternate 12 mm and 14 mm clusters.
5. Seal and Set
👉For details, please refer to our blog: Lash Clusters 101: The Ultimate DIY Lash Extension Guide
How to Enhance the Wet Look
Want to take your DIY wet set lashes to the next level? Try these tips:
-
💧 Use a lash gloss or serum: A clear lash serum can add subtle shine to your lashes, making them look freshly wet.
-
🎯 Keep makeup minimal: Wet set lashes are a statement on their own. Pair them with a fresh, dewy complexion and soft lip balm for a natural vibe.
-
🔥 Layer clusters strategically: Adding a few longer spikes in the outer corners enhances the cat-eye effect.
How Long Do DIY Wet Set Lashes Last?
If applied properly and sealed, DIY wet set lashes can last 5–7 days, sometimes even longer with careful maintenance. Avoid oil-based makeup removers and heavy eye creams, and gently brush your lashes daily to keep them neat and separated.
The best part? If one cluster falls off, you can easily replace it in minutes — no need to book a refill appointment.
Final Thoughts: Wet Set Glam Made Easy
Wet set lashes are one of the most stunning lash styles out there — bold yet natural, dramatic yet effortless. And now, you don’t need to spend hundreds at a salon to get the look. With the right DIY lash clusters, bond, and a little practice, you can recreate that signature “just stepped out of the shower” lash style at home in under 30 minutes.
Whether you’re getting ready for a night out, a photoshoot, or just want to feel a little extra every day, DIY wet set lashes are a fun, budget-friendly way to elevate your look — no appointment required. 💧✨
Ready to try it yourself? Start with a high-quality DIY lash kit that includes natural-looking clusters, and you’ll be surprised how professional your results can look — all from the comfort of your own home.
🥰Product Recommendations: